Izenda FORMS

This documentation is for the legacy Izenda 6 product. Documentation for the new Izenda 7 product can be found at https://www.izenda.com/docs/
14.1 Introduction To FORMS
Preface
Izenda FORMS is an add-on to Izenda REPORTS, Izenda’s core reporting and business intelligence platform. Izenda connects directly to relational and non-relational data sources. Through its .NET API, it loosely couples with Microsoft-based applications to integrate with the current security, branding, and navigation of your .NET applications.
About FORMS
Izenda FORMS allows the user to input HTML5 into a browser-based HTML designer and then use that code to build an Izenda form report. Izenda’s point-and-click interface is designed for the standard business user, with advanced options available for those with greater access and skill. Izenda FORMS is one of these advanced options.
FORMS Design NOTE1: Though a basic user can easily make changes to existing forms, designing new forms does require a user who is comfortable with HTML5. Many users will never design FORMS, but simply make modifications to current core FORMS.
FORMS Design NOTE2: Izenda FORMS will override the normal reporting behavior within Izenda when a FORM is attached to a report; the FORM is what the engine renders. To use a standard Izenda report in tandem with a FORM, you must call the report into the HTML FORM itself.
With Izenda FORMS, you can:
Create WYSIWYG forms using HTML.
Import existing HTML forms and push data from your database into specific form locations.
Utilize our high quality HTML->PDF rendering engine.
Create, and easily customize, pixel perfect, printer-friendly, dynamic web forms to deliver to your end users.
Create Master Detail Reports.
Embed Sub-Reports and use smart tags.
Employ flexible filters and high performance repeaters.
Customize the product through our rich API.
Introduction to using the Forms Tool
This section of the user manual will walk you through the basic usage of the Izenda FORMS tool. Any data that your application developer has included in the database can be accessible to you in creating ad hoc forms.
A form is an HTML document which you populate with data from a database. As an example, let’s think of a form letter sent to every customer. The letter has fixed copy, but also dynamic portions such as recipient name, address, etc. If you have a database which contains those dynamic elements, then you can insert them directly into the fixed portion in order to produce publishable output.
FORMS Design NOTE3: The default behavior of forms is to generate one entry per ‘row’ of data until all rows are generated or the user-defined limit is reached.
14.2 Basic FORMS Reports
Starting a Forms Report
To create a form-based report using Izenda FORMS, simply click ‘Design Report’ as you would to create any report using Izenda. Once you are in the ‘Data Sources’ tab, choose the relevant data sources.
Continue to the ‘Fields’ tab. Choose any relevant fields. You can use the ‘Format’ drop-down menu to execute data formats within the form you create. Izenda FORMS will allow you to choose fields to call into the form from any available inside the selected data-source without actually choosing them in the ‘Fields’ tab; when the form and report are saved and reloaded, FORMS will automatically populate the ‘Fields’ tab with the fields called in the form.
FORMS will recognize aliases changed in the ‘Fields’ tab under ‘Description.’ For instance, a field named ‘OrderID’ and aliased as ‘Order#’ in the ‘Description’ column would be called within Izenda FORMS as [Order#]. Using the ‘Advanced’ button for each field, expressions or concatenations can be implemented into the fields called by FORMS.
Examples:
[dbo].[Employees].[Address] + ', ' + [dbo].[Employees].[City] =>
111 Grand Ave, Atlanta
[Quantity] * [Price] => 5 * 10.50 => $52.50
After choosing relevant fields and adjusting formats in the ‘Fields’ tab, click ‘Design Form’ at the bottom of the ‘Fields’ list.
Building Reports
The form designer has two modes: ‘Editor’ and ‘Source.’ Izenda’s form designer functions in the same manner as any browser based text editor when in ‘Editor’ mode. In this interface you can see a preview of rendered HTML and any user can make a quick customization or change. Changes made in ‘Editor’ mode are automatically parsed into HTML.
Source View
Source mode accepts HTML directly. If you are designing a new form from scratch, most HTML designers will find it is best to build new projects using a web design tool like Expressions and then simply paste the source code into Izenda FORMS in Source mode. The user should not attempt to build a complex report using Editor mode, because the parsing engine will add additional unnecessary complexity as the report complexity increases, and any HTML added into Editor mode will display as text rather than as the markup that it actually was meant to be.
Editor View
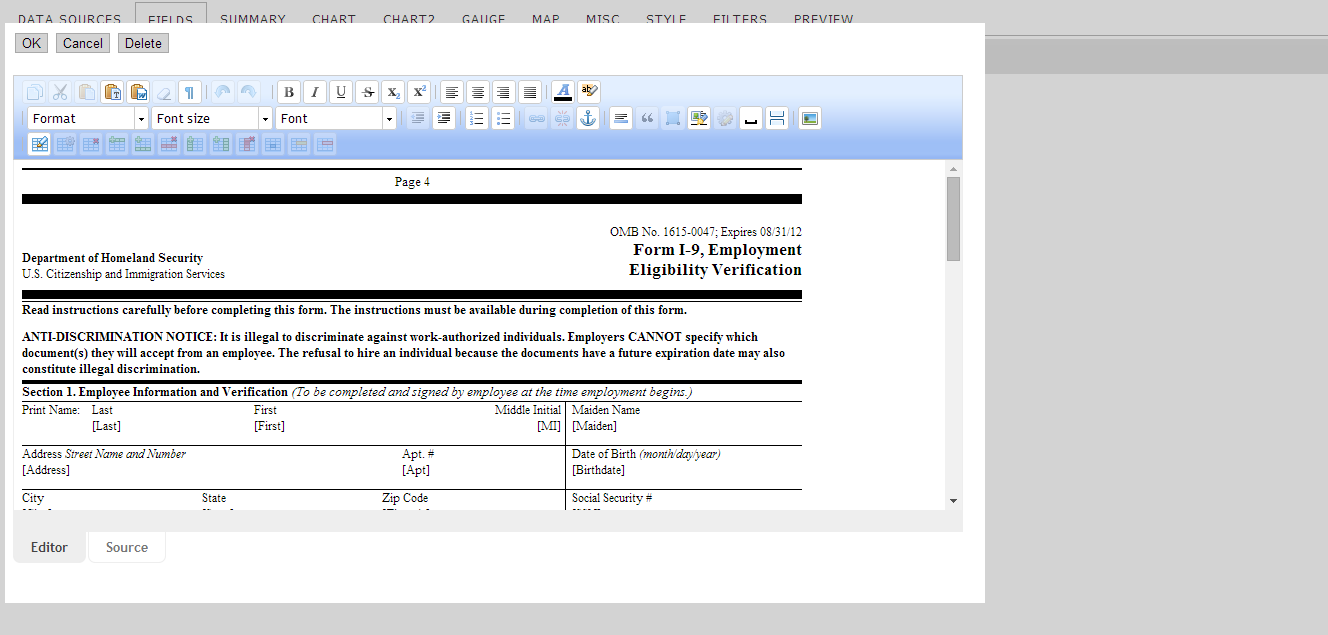
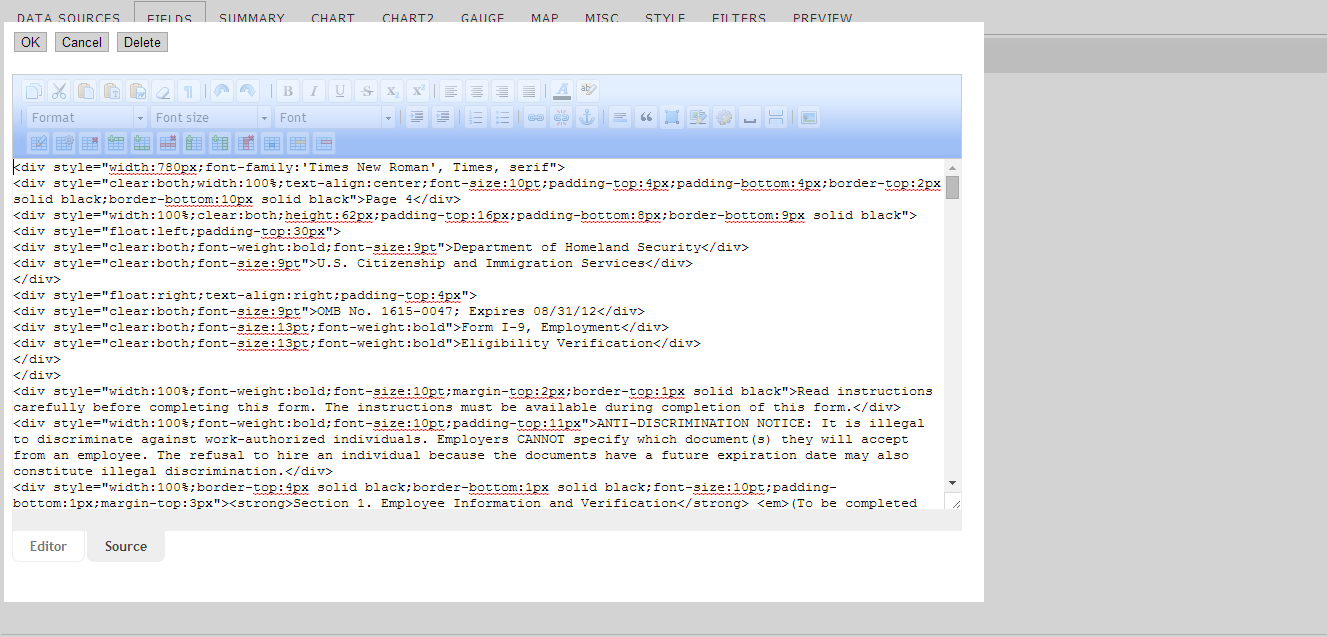
Editor mode allows you to insert text only. Any markup that is entered here will be translated into a form that will not be interpreted by the browser. You can see this if you paste HTML into the Editor mode box and then click Source. However, if you are editing in Source mode and click the Editor mode button, you will see that the HTML is parsed into what will be displayed in your report. The I9 form above is generated in such a way.
Again, it is best practice to build an Izenda FORMS report in Source mode by hand or by using an external web design tool to generate HTML. Once this HTML is pasted into the tool while in Source mode, you can easily switch to Editor mode to fine-tune the output.
Adding Fields
Fields are inserted into a form using square brackets. The name within the square brackets should correspond to either the actual name of the field or the alias you gave the field. Either one will work, although there are times when you should use one over the other, as we will describe below.
Example:
If you want to display the field 'ShipCountry', then at the appropriate place in the form, you would place the [ShipCountry] tag. You could also place [Ship Country] in your form if you aliased the [ShipCountry] as such. The alias is the exact text in the "Description" text box on the Fields tab.
14.3 Advanced FORMS Concepts
Nesting Reports and Forms
As described earlier, we can specify fields by using either one or two square brackets. We covered the single square bracket above. Now we will cover a double square bracket. By using double square brackets, you can call another form or report. If you have a form called City Data in the Subreports folder, you would type [[Subreports/City Data]] into your form to embed that form into your report. This works regardless of whether the embedded report is a form or a non-form report.
Caution is recommended when designing nested sub-reports and forms. When you call a report from inside of a master report, you are essentially using a query to run another query (and by extension, all queries that might be contained within that nested query). It is thus possible to build a chain of nested reports that can cause severe performance issues.
The flexibility of nesting reports and forms is most desirable for many small cases, in which sub-reports only exhibit a very small performance hit. Complex or multi-level nested reports may experience significant performance issues; in these cases it is best to find a way to achieve your goal without using sub-reports.
Subreporting and Forms
There are two ways to call a subreport in a Form: the single bracket method and the double bracket method.
Single Bracket
The single bracket method of subreporting is simply the same subreporting method used outside of Forms, in a default tabular report. A field is assigned to a subreport and passes the value from one cell at a time to that subreport. Since this field is called as a normal field, with a set of single square brackets like [FieldName], we call this the single bracket method. Linked subreports are accessible in forms, as are embedded subreports. It is also possible to pass multiple keys from a form to a subreport, but when doing please make sure that all of the values being passed to the subreport are being drawn from the same repeater-level of the form: in other words, you cannot pass a primary drilldown key from the top level of a form, and a secondary drilldown key from within a repeater!
All standard rules of subreporting apply to Forms as well as default tabular reports. You can have as many subreports as you have fields, and each field can only target a single subreport. The URL feature on the Advanced Field Settings is also accessible on a form, and behaves the same as a subreport with the link(new window) behavior.
Double Bracket
The double bracket method is exclusive to Forms. This method calls an entire report by placing the full report name in double square brackets, for example: MyCategory/MyReportName. When using the double bracket method, values are selected and passed from parent to child using filters. Filters must be defined and populated on the parent report, and the child report will inherit those filters. This is a requirement to make the double bracket method work - it is not possible to simply import an entire report into a form without any sort of control over which values are returned.
Single Vs. Double
There is no clear advantage to using either method. The single bracket method is useful for invisibly passing drilldown values, passing different sets of values to multiple reports, and designing reports that do not require user input to pass values. The double bracket method is useful for passing the same set of values to a number of subreports, or filtering a parent and child report with the same values.
Toolbar
Fields
This dropdown allows the user to insert any field from the currently selected data set. This is the same as if the user had typed the name of the field in square brackets, but is accessible from within the Forms designer.
Columns
This dropdown allows the user to insert any field from the Izenda fields tab. This is the same as if the user had typed the name of the column as defined in the Description box for a given field. The difference between a field and a column is that a field is drawn directly from the database, whereas a column is drawn from Izenda's field list on the Fields tab and thus can be modified through aggregation, formatting, an expression, etc.
Subreports
This dropdown allows the user to select any report visible to them in the current environment which has a drilldown key defined. Subreports will be inserted using the double bracket method, meaning that the entire subreport will be called and will be controlled using filters. Single bracket subreports can be placed using the Columns dropdown.
Page Breaking
There is currently no way to add a page break to a .doc word export, because of the limitations of the MHTML format Izenda exports and then converts to .doc or .xls. Pagebreaking is respected in HTML-based print exports, such as the print to HTML and most PDF rendering engines.
Smart Tags
Filters
The Filters smart tag allows the user to place a string or set of strings on the form which describes the currently active filters. In order to use this tag, the "Show Filters in Report Description" box on the Filters tab must be checked. The Filters tag simply reproduces that text, but at a custom location on the form.
Date
The Date smart tag allows the user to place a timestamp on the form. This timestamp will be the current system time as of the moment the form is rendered.
Subtotals and the @Subtotal decorator
Subtotals are used in conjunction with repeaters on forms to generate subtotals of a repeated numeric column. In order to use @Subtotal, you must do these things:
1) Every field outside of the repeater block must be visually grouped. 2) The "Add Subtotals" checkbox must be checked. 3) The field you wish to subtotal is added to the beginning of the @Subtotal decorator. For example, [LineItemTotal@Subtotal]
The @Subtotal decorator can only be used once. It must be placed outside of the repeater being subtotaled, but inside of any other repeaters. If we think of repeaters as being 'levels', then the @Subotal must be placed one level up from the fields which it is totaling.
Repeater Tag
Note: In order for repeater tags to persist in between the elements of an HTML structure such as a table, they must be in a comment tag
If you have content that you want to repeat within a form, you don’t need to use a nested sub-form. By enclosing this content with the [repeater] tag, the forms engine will repeat that content until it is exhausted.
In this example, we would create a report with 1+n rows. The first row is static and displays text in two cells with the text "Person" and "Certs". The second row is within a repeater, which means that it will generate n times where n is the number of valid [PersonID] entries. This repeater has a nested repeater in the second cell, which will populate all valid [Name] for each [PersonID].
<table>
  <tr>
    <td>Person</td>
    <td>Certs</td>
  </tr>
[repeater]
  <tr>
    <td>[PersonID]</td>
    <td>[repeater][Name], [/repeater]</td>
  </tr>
[/repeater]
</table>
All of these count against the Records display limit. If you have four [PersonID] records and each [PersonID] has three [Name] entries, then the form would count as 12 records. This means that if you set it to only display 10 records, the form would not display completely.
Limitations: You can only nest one set of repeaters at a time. This is a correct use:
[repeater]

    [repeater]

        [repeater]

        [/repeater]

    [/repeater]

[/repeater]
And this is an incorrect use:
[repeater]

    [repeater]

    [/repeater]

    [repeater]

    [/repeater]

[/repeater]
Repeater Smart Tags
Repeaters take three different forms:
[repeater], <repeater>, and <div class="iz-repeater">
All are nearly identical, the only difference is how and when they are used.
[repeater] and are functionally the same. They will repeat anything inside of them, including HTML content. [repeater] will be shown on the form designer, outside of source mode. It should be used when your form uses little or no HTML elements such as tables or div structures, and allows a user to see where a repeater is being placed in a basic word document. functions identically to [repeater], with the exception that it is only visible in source mode on the designer. is generated by the use of the repeater smart tag in the forms designer.
The class iz-repeater is placed when an HTML element such as a div is selected using the 'add repeater to element' smart tag. This permits report designers to add or remove repeaters from HTML elements without entering source mode. Although the class is applied to an element, it functions identically to other forms of the repeater tag.
So all three of these uses of the repeater tag produce identical output:
[repeater]Some content![/repeater]

<repeater>Some content!</repeater>

<div class="iz-repeater">Some content!</div>
Adding inline CSS to a Form
To add CSS to a form inline, you must use the <!--FORMSTYLE--> tag. We do not close the formstyle tag, we simply place it again to end the style block.
NOTE: Best practice is to add CSS to the CSS box on the Style tab of the report designer!
Using <!--FORMSTYLE--> permits a user to add CSS to the body of a form. It functions the same as the style tag in HTML. However, the best location to place CSS for a form is in the CSS box on the Style tab. This is because an Izenda Form is simply a custom HTML template used to render an underlying Izenda report, which is technically a different object. This report object can have its own CSS, inherited from the environment or other custom settings, which may conflict with or override the CSS on a form. Any styling placed in the CSS box will be placed in the master style tag of the report itself, which will devolve to and be accessible within the form. It may be useful to write CSS inside of the formstyle tag for testing and debug purposes, then move all of this styling to the CSS box for production.
Adding inline Javascript to a Form
To add javascript to a form inline, you must do two things.
First, you must place your script inside the <!--FORMSCRIPT--> tag. We do not close the formscript tag, we simply place it againt to end the script block.
Second, you must place a container div with the id 'iz-custom-js' inside the script tag.
This example script generates a custom date format:
<!--FORMSCRIPT-->
<div id="iz-custom-js">
var d = new Date();
var currDay = d.getDate();
var currMonth = d.getMonth() + 1;
var currYear = d.getFullYear();
var fullDate = currMonth + "-" + currDay + "-" + currYear;
jq$(".myCustomDate").html(fullDate)
</div>
<!--FORMSCRIPT-->
Once the date object has been created, we pull out various aspects of it and combine them to create our custom value, here named 'fullDate'. We then use jquery to find all divs of the class 'myCustomDate' and replace the inner text with the value of fullDate. On our form, we would then place a div wherever we want a custom date:
<div class="myCustomDate">You should not see this!!</div>
The text inside the div, 'You should not see this!!', is error text that will appear instead of the date if something goes wrong.
Advanced FORMS report tutorial
This tutorial will demonstrate how to incorporate the various concepts described above to create the following FORMS report:

Step 1: The main report
The main report is going to hold all of your top-level data and will be used for the drilldown reports that will make up the sub-sections of this FORMS report. Below are the steps to create the main report.
- On the ReportList page of our demo site, go to New and select Report.
- On the DataSources tab choose Employees
- Go to the Fields tab and select the following columns
- EmployeeID: call it SubreportA in the Description
- EmployeeID: call this one SubreportC in the Description. We will make use of these two fields later.
- LastName: call this one Employee Name in the Description.
- FirstName: do not do anything special with this field
- Address
- City
- Region
- PostalCode
- Country
- Click Advanced next to LastName (the gear-shaped image)
- In the Expression field, enter the following:
[FirstName] + ' ' + [LastName] - Click Design Form at the bottom of the Fields tab
- Enter the following code into the form under Source View
<div class="report-container">
	<div class="sectionA">
		<div style="background-color:darkslateblue;width:100%"><span style="color:white;margin-left:5px;">Employee</span></div><table style="width:100%;">
			<tbody><tr>
				<td>
					<table>
						<tbody><tr>
						  <th class="job_attrs">Employee Name:</th>
						  <td style="font-weight:bold;">[Employee Name]</td>
						</tr>
						<tr>
						  <th class="job_attrs">Address:</th>
						  <td>[Address]</td>
						</tr>
						<tr>
						  <th class="job_attrs">City:</th>
						  <td>[City]</td>
						</tr>
						<tr>
						  <th class="job_attrs">Region:</th>
						  <td>[Region]</td>
						</tr>
						<tr>
						  <th class="job_attrs">Country:</th>
						  <td>[Country]</td>
						</tr>
						<tr>
						  <th class="job_attrs">Postal Code:</th>
						  <td>[PostalCode]</td>
						</tr>
					</tbody></table>
					<br>
                                        [SubreportC]
				</td>
				<td>
					[SubreportA]
				</td>
			</tr>
		</tbody></table>
	</div>
</div>
- Go to the Style tab and enter the following code into the CSS box
.report-container td, .report-container th{
	font-size: 12px;
	font-family: sans-serif;
}

.report-container  table{
	border-collapse: collapse;
}

.report-container th{
	font-weight: bold;
}

.report-container tr.border-bottom th{
	border-bottom: 1px solid black;
}

.report-container th.job_attrs{
	text-align: right;
	padding-right: 20px;
}

.report-container table.surveys th{
	text-align: left;
}
.report-container table.surveys td{
	vertical-align: top;
}

.report-container  table.comp-analysis td{
	padding: 2px 20px;
}
- Save the report under any name you wish.
Step 2: SubreportA
SubreportA is going to be a list of orders that each employee is associated with. This means that the drilldown key for this report is going to be EmployeeID. You can scroll up to step 1 and find that this will correspond to the field we named SubreportA. Follow the steps below to create this report:
- On the ReportList, go to New and select Report
- On the DataSources tab, click Employees, Orders, Order Details, and Products. Continue to Fields
- On the Fields tab, choose the following fields
- OrderID: No alias is required
- OrderID: Alias this one as SubreportB (edit the description textbox)
- UnitsOnOrder: Call this field Order Total
- UnitsOnOrder: Call this field **Total Units On Order
- Apply a Group function to the first two fields and a Sum function to the next two fields
- Click Advanced next to the first UnitsOnOrder field and enter the following into the Expression field:
SUM([dbo].[Products].[UnitsOnOrder] * [dbo].[Products].[UnitPrice]) - Click Design Form at the bottom of the Fields tab
- Enter the following code into the form under Source View
<table style="width:100%;min-width:550px;">
	<tbody>
		<tr><td>
		<table style="margin-left: auto; text-align: left">
			<tbody>
				<tr class="border-bottom">
				<th style="width: 200px; padding-right: 10px"> Order Number</th>
				<th style="width: 138px; padding-right: 10px"> </th>
				<th style="width: 106px;">Units On Order</th>
				<th style="width: 106px;">Total Price</th>
				</tr>
                                <!-- [repeater] -->

				<tr class="border-bottom">
					<td style="text-align: left">[Order ID]</td>
					<td style="text-align: left"></td>
					<td style="text-align: left">[Total Units Ordered]</td>
					<td style="text-align: left">[Order Total]</td>
				</tr>
				<tr style="border-bottom:1px solid black;">
					<td colspan="4"><table style="margin-left: auto; text-align:left;"><tbody><tr><td>[SubreportB]</td></tr></tbody></table>
				</td></tr>

				<!-- [/repeater] -->
			</tbody>
		</table>
	</td></tr></tbody>
</table>
- On the Misc tab, click the drill-down key dropdown and select EmployeeID
- Save the report under any name you wish. Be sure to remember it, though. You will need it later.
Step 3: SubreportB
SubreportB is going to be a breakdown of the products that are contained on each order that each employee has associated to his/her employee ID. We will be using this on SubreportA to link orders to products. So we will be using the OrderID as the drilldown key for this report. Follow the steps below to create this report:
- On the ReportList, go to New and select Report
- On the DataSources tab, click Orders, OrderDetails, and Products
- On the Fields tab, choose the following fields:
- ProductName
- UnitsOnOrder
- UnitPrice
- Click Design Form at the bottom of the Fields tab
- Enter the following code into the form under Source View
<table style="margin-left: auto;">
  <tbody>
    <tr class=" border-bottom">
      </tr></tbody><tbody><tr><th style="width: 200px; text-align:left;">Product</th>
      <th style="width: 102px; text-align:left;">Units</th>
      <th style="width: 102px; text-align:left;">Price Per Unit</th>
    </tr>
    <!--[repeater]-->
    <tr>
      <td style="font-weight:bold;">[ProductName]</td>
      <td style="text-align:left;">[UnitsOnOrder]</td>
      <td style="text-align:left;">[UnitPrice]</td>
    </tr>
    <!--[/repeater]-->
  </tbody>
</table>
- On the Misc tab, click the drill-down key dropdown and select OrderID
- Save the report under any name you wish. Be sure to remember it, though. You will need it later.
Step 4: SubreportC
SubreportC is a sub-report of the main report as well and will use the drill-down key EmployeeID to display its data. This report specifically makes use of fields with special datatypes that cannot normally be included in grouped and distinct SELECTed data. This will allow us to simulate grouping on these fields.
- On the ReportList, go to New and select Report
- On the DataSources tab, click Employees
- On the Fields tab, choose the following fields:
- Photo
- Notes
- Click Design Form at the bottom of the Fields tab
- Enter the following code into the form under Source View
<hr>
<table><tbody>
<tr class="ReportHeader"><td>Image</td></tr>
<tr><td>[Photo]</td></tr>
<tr class="ReportHeader"><td>Notes</td></tr>
<tr><td>[Notes]</td></tr>
</tbody>
</table>
<hr>
- On the Misc tab, click the drill-down key dropdown and select EmployeeID
- Save the report under any name you wish. Be sure to remember it, though. You will need it later.
Step 5: Setting the subreports
Now we have all four reports created: the main report, SubreportA, SubreportB, and SubreportC. We now need to link them to each other and apply the finishing touches.
- Open the main report you created in the Report Designer.
- Remember the SubreportA column? Now we can wire that up.
- Click Advanced (the gear to the right of the field).
- In the Subreport field, select the report you created in Step 2. This is SubreportA.
- In the Drill-Down Style field, select Embedded.
- Click OK.
- For SubreportC, do the following:
- Click Advanced.
- In the Subreport field select the report you created in Step 4. This is SubreportC.
- In the Drill-Down Style field, select Embedded.
- Click OK.
- Save the report.
- Open SubreportA (the report created in Step 2) in the Report Designer.
- For the SubreportB column, do the following:
- Click Advanced.
- In the Subreport field select the report you created in Step 3. This is SubreportB.
- In theh Drill-Down Style field, select Embedded.
- Click OK.
- Save the report.
Step 6: Viewing and tweaking the report
If you go back to your main report and view it, you should see an output very similar or identical to the one shown in the image at the beginning of the tutorial. You can see from this example how complex pixel-perfect reports and drill-downs can be achieved through FORMS. If you have data that is not reliant on a drilldown, you can use the double bracket method described in section 14.3. When we combine all of these reports together, we essentially get a parent report that tracks individual employees and each item in the sub-report is designed to track individual orders. We then have a sub-report nested in the sub-report that tracks products placed on that order. So if there are five employees on record, we run one query plus five queries to obtain those employees' orders (1 + (1*5) = 6 queries). If each EmployeeID has ten associated OrderIDs, a sub-query will be run for each of those OrderIDs to obtain the product information (6 + (6*10) = 66 queries). Always be careful with how many queries you are performing. As you nest sub-reports, the number of queries performed on the database increases greatly.