3.0 Data Sources Tab

This documentation is for the legacy Izenda 6 product. Documentation for the new Izenda 7 product can be found at https://www.izenda.com/docs/
About
The Data Sources tab shows you which Tables or Views you have access to from the database. Your system administrator can set up the interface to simplify the data selection process, allowing for easier report creation and less time consumed trying to understand complex data models.
3.1 Simple Mode

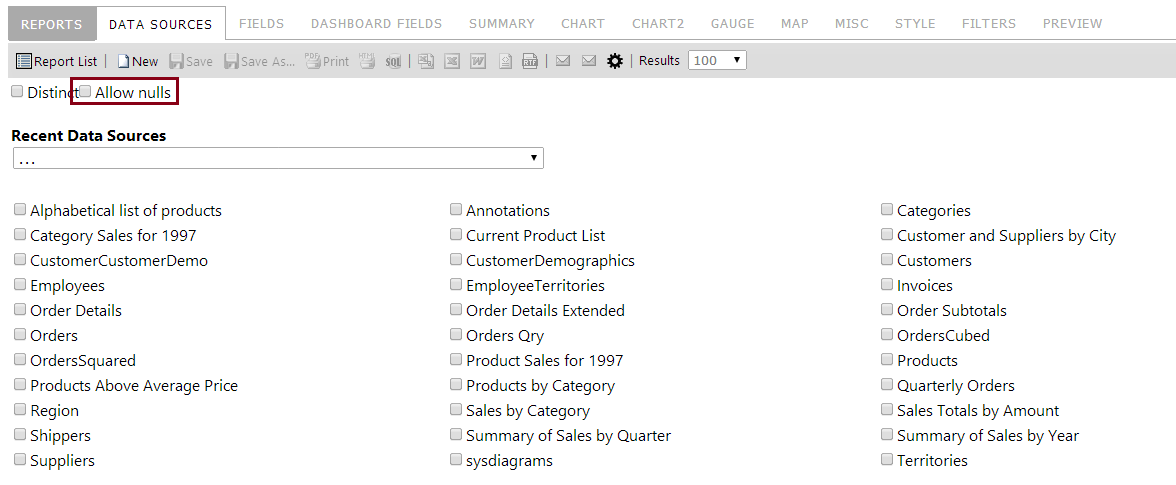
The screenshot above takes a look at the simple view of the datasources tab. Tables and views are represented by checkboxes that become enabled/disabled based on the primary keys located in the selected items. This means that when you check one box, all tables that cannot be joined to it will automatically be disabled. After each subsequent table you join by clicking, the list of available tables that are valid candidates to join with will be refreshed (see image below).

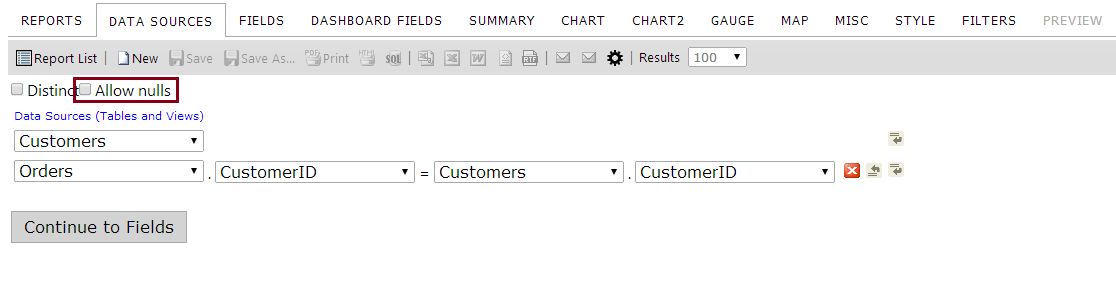
3.1.1 Simple Mode Allow Nulls
By checking the 'Allow nulls' checkbox, you tell the system to use an OUTER JOIN as its join type. But the particular OUTER JOIN type used depends on what mode you use. For Simple mode, a FULL OUTER JOIN is used when the 'Allow nulls' checkbox is checked.
Below is the SQL generated from this selection:
SELECT
[dbo].[Orders].[OrderID] AS 'Order ID'
FROM [dbo].[Order Details]
FULL OUTER JOIN [dbo].[Orders] ON [dbo].[Order Details].[OrderID]=[dbo].[Orders].[OrderID];
3.2 Admin Tips
Report administrators should check out the following code samples for the methods of controlling user access to data sources.
3.3 Advanced Mode
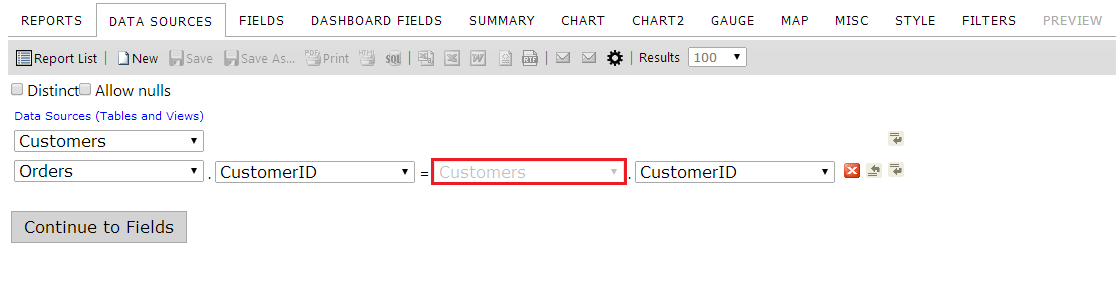
In Advanced Mode, you will have to select the relationships that exist between the tables or views yourself. You will start with a drop-down menu that lists the various Tables and Views that are available (outlined in red in the screenshot below). The following section requires basic knowledge of database terminology.
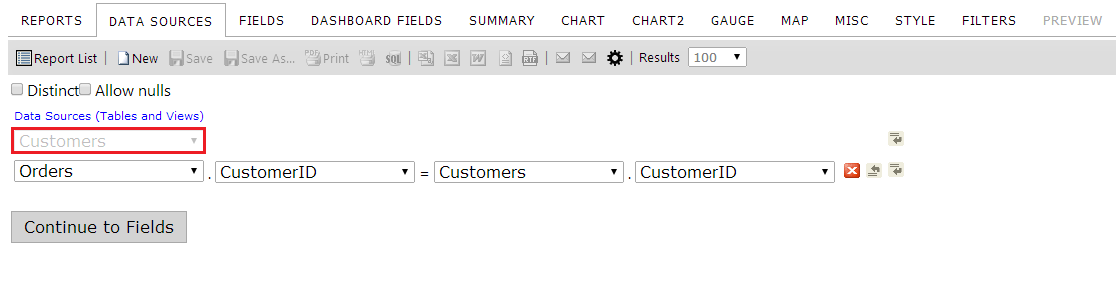
To join two tables and/or views, they must have fields with identical primary/foreign keys. For example, in the Northwind sample database, both the Customers and the Orders tables have the same CustomerID field. These two tables will be able to be joined together using the primary key in the Customers table and the foreign key in the Orders table. Foreign keys are not required to have the same name as the primary key, but must possess a relationship that results in one or more selected rows when joined together. To add another table to join on, press the  button.
The very first dropdown on the new row is the Primary Table dropdown menu (shown below). This is the table/view you want to join into your collection of Data Sources. This will hold all of your possible DataSources regardless if they have fields that can act as viable joining points to your source table/view or not.
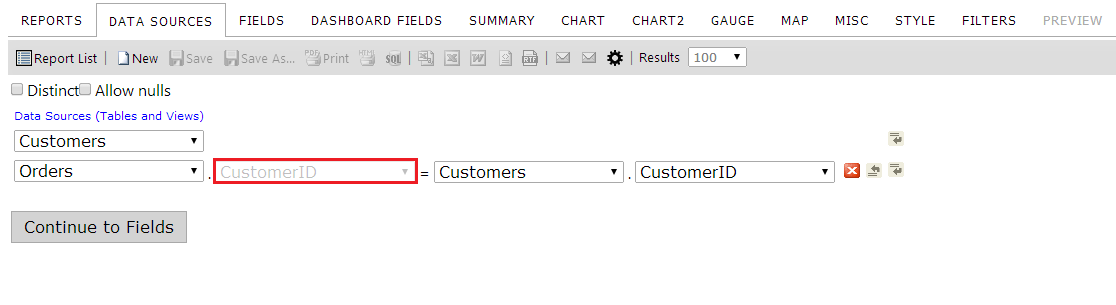
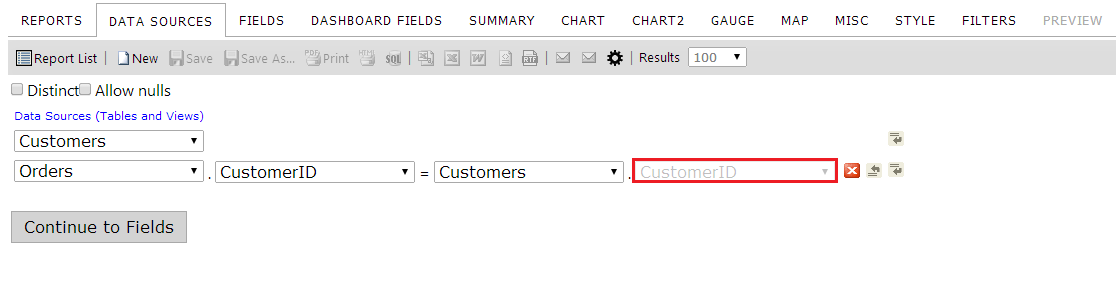
When you select an additional Data Source, Izenda will automatically attempt to find what it thinks the appropriate relationship is. However, in this view the user has the capability to manually define what these relationships should be. To that end, there is the Primary Key dropdown. This dropdown appears to the right of your joined table/view and contains a list of all the fields for that table/view. Below is a screenshot showing what this looks like.
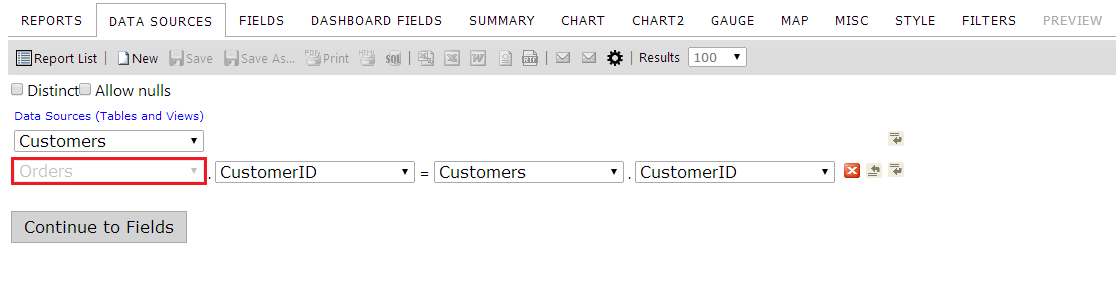
The Foreign Table dropdown menu (shown below) is a list of the tables/views that have been selected previously. To eliminate self-referential issues, the table/view listed in the dropdown on the current row is not included. Select the table/view to join the table/view in that row.
The Foreign Key dropdown menu (shown below) is a list of fields in the table/view that are selected in the Foreign Table dropdown menu to the left. Here you can select the field to join with the table/view in the Primary Table dropdown.
The Join Field dropdown menu (shown below) is a list of options specifying how your Data Sources will be associated with each other and how data will be retrieved. Join types are explained in Section 3.4.

Admins: See Section 3.2 for information on how to show this field (hidden by default).
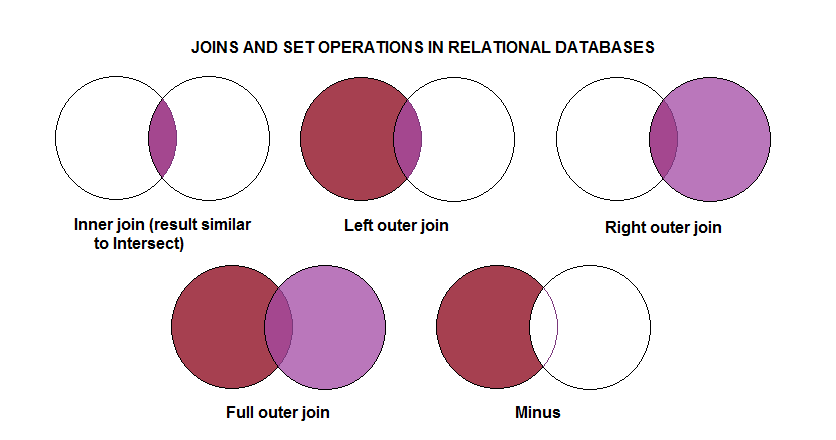
3.3.1 Understanding the Data Model
Most users choosing to use the Advanced Mode need to have a clear understanding of the database schema to be able to quickly join tables together. Database schemas are blueprints of how the data is organized in the database. This mode does allow for greater flexibility in selecting the types of joins that can be performed, but is not recommended for most users. The database schema for the Northwind example database is displayed below.
3.3.2 Advanced Mode Allow nulls
For Advanced mode, a LEFT OUTER JOIN will be used instead of the normal join when 'Allow nulls' is checked.
3.3.3 Join Alias Textbox
Allows user to input the name of the joined table that you selected. By default, Join Alias Textbox is disabled. You have the option to change the Join Alias and the joined table will appear with the alias in Fields Tab when you choose columns. For more information, refer to Join Alias Textbox
3.4 Join Types
The join type dropdown, as described above, is found to the right of the Foreign key field when joining Data Sources in Advanced Mode. By default, Izenda will perform a Left Inner Join across the data sources selected. When this dropdown isn't shown, Izenda performs the default join operation.
3.4.1 SQL Samples of Various Join Types
Inner (Direct) Join: Selects rows from two tables such that the value in one column of the first table also appears in a column of the second table.
SELECT DISTINCT
[dbo].[Invoices].[CustomerName] AS 'Customer Name'
FROM [dbo].[Orders]
INNER JOIN [dbo].[Invoices] ON [dbo].[Invoices].[CustomerID]=[dbo].[Orders].[CustomerID];
Cross Join: A cross join will return a result table where each row from the first table is combined with each row from the second table.
SELECT DISTINCT
[dbo].[Invoices].[CustomerName] AS 'Customer Name'
FROM [dbo].[Orders]
CROSS JOIN [dbo].[Invoices];
Left(First Exists) Join: The Left Outer Join known also as Left Join returns all rows from the left table in the Left Outer Join clause, no matter if the joined columns match. A field in a result row will be null if the corresponding input table did not contain a matching row.
SELECT DISTINCT
[dbo].[Invoices].[CustomerName] AS 'Customer Name'
FROM [dbo].[Orders]
LEFT OUTER JOIN [dbo].[Invoices] ON [dbo].[Invoices].[CustomerID]=[dbo].[Orders].[CustomerID];
Right Join: The Right Outer Join known also as Right Join returns all rows from the right table in the Right Outer Join clause, no matter if the joined columns match. A field in a result row will be null if the corresponding input table did not contain a matching row.
SELECT DISTINCT
[dbo].[Invoices].[CustomerName] AS 'Customer Name'
FROM [dbo].[Orders]
RIGHT OUTER JOIN [dbo].[Invoices] ON [dbo].[Invoices].[CustomerID]=[dbo].[Orders].[CustomerID];
Full Join: The Full Outer Join known also as Full Join returns all rows from Both the Right Outer Join & Left Outer Join. A field in a result row will be null if the corresponding input table did not contain a matching row.
SELECT DISTINCT
[dbo].[Invoices].[CustomerName] AS 'Customer Name'
FROM [dbo].[Orders]
FULL OUTER JOIN [dbo].[Invoices] ON [dbo].[Invoices].[CustomerID]=[dbo].[Orders].[CustomerID];
3.5 Function Buttons of Data Sources Tab
At the far right of each joined table/view row on the Data Sources tab are several button controls( ,
,  , and
, and  . These are described below.
| Icon | Control Name | Description |
|---|---|---|
|
Delete button | Click this button to delete the row the button is on. |
|
Insert Row Above Button | Click this button to insert a row above the row the button is on. |
|
Insert Row Below Button | Click this button to insert a row below the row the button is on. |
3.6 Report Designer Toolbar
Here is a general overview of the buttons on the tab of the toolbar. You can see more details at this link
| Icons | Features | Description |
|---|---|---|
 |
Back | Goes to the browser’s previous page. |
 |
Report List | Navigates to the Report List page. |
 |
New | Creates a new report. |
 |
Save | Saves a report. |
 |
Save As | Allows a new report name to be saved. |
 |
Print (PDF Export) | Saves the report as a PDF document. |
 |
Print (HTML Export) | Saves the report as a HTML document. |
 -or- -or-  |
IE/Fire Fox/Chrome | Runs the report in the web browser. |
 |
Schema | Display database diagram |
 |
SQL | Views the report in SQL mode. |
 |
CSV | Saves the report as a CSV file. |
 |
Excel Spread sheet | Saves the report as a MS-EXCEL file. |
 |
Word Document | Saves the report as a MS-Word document. |
 |
XML document | Saves the report as a XML document. |
 |
Open office document | Saves the report as an Open Office Document. |
 |
RTF document | Saves the report as a RTF document |
 |
E-mails a report to a client | |
 |
Settings | Takes you to Settings.aspx page. |